Proficient News for Ubuntu fans ,after all the await approved has released its latest and stable version of Ubuntu 18.04 LTS on 26th Apr 2018. Lawmaking name for this release is "Bionic Beaver" and it has come up with diverse interesting features. In this commodity, we volition be looking about how to install Ubuntu 18.04 LTS in a desktop with screenshots.
Ubuntu 18.04 LTS – New Features:
Ubuntu 18.04 LTS has been released with a lot of new features and improvements, some of the important features are listed below:
- Support and Updates of Ubuntu 18.04 LTS for next 5 Years (April 2023)
- New latest and stable Linux Kernel version iv.15
- Installer offer a new option of "minimal Installation"
- Updated LibreOffice 6.0
- The Bionic Beaver supports attractive and beautiful color emojis
- 18.04 LTS besides comes with a new Suru icon theme that will make your desktop much more colorful
- Updated GNOME (3.28) desktop surroundings
- XORG is the new default display server and replaces Wayland
- Fast and improved boot speed
- Along with other major improvements and bug fixes
Minimum System Requirement for Ubuntu eighteen.04 LTS (Desktop)
- 2 GB RAM
- Dual Core Processor (2 GH)
- 25 GB complimentary Hd space
- Installer Media (DVD or USB)
- (optional) Internet Connectivity if you are planning to download third political party software and updates during the installation
Pace-by-Step Guide to Install Ubuntu 18.04 LTS on your Laptop or Desktop
Step i) Download Ubuntu 18.04 LTS ISO File
Please brand certain you take the latest version of Ubuntu 18.04 LTS, If not, delight download the ISO file from the link here
https://www.ubuntu.com/download/desktop
Since Ubuntu 18.04 LTS merely comes in a 64-bit edition, so you lot tin can install it on a organization that supports 64-flake architecture.
Step ii) Create a Bootable Disk
Once the ISO file is downloaded then next footstep is to fire the downloaded ISO image into the USB/DVD or flash bulldoze to boot the computer from that drive.
Also make sure yous change the boot sequence so that system boots using the bootable CD/DVD or flash bulldoze.
Read More on " How to Create Bootable USB Deejay / DVD on Ubuntu / Linux Mint"
Step iii) Boot from USB/DVD or Wink Drive
Once the system is booted using the bootable disk, you can run across the post-obit screen presented earlier you with options including "Try Ubuntu" and "Install Ubuntu" every bit shown in the image below,
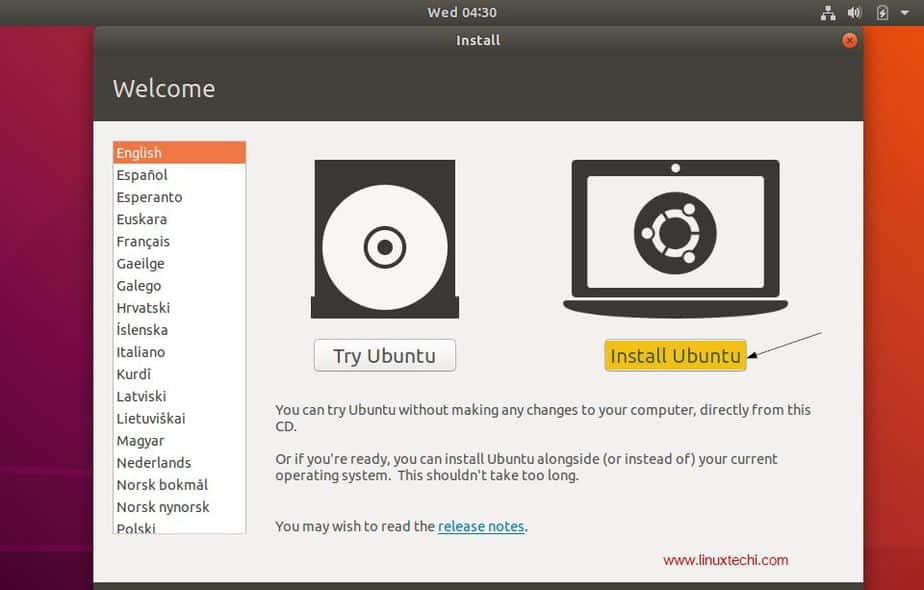
Even though when you click "Try Ubuntu" you can have a sneak peek into the 18.04 LTS without installing information technology in your organisation, our goal here is to install Ubuntu 18.04 LTS in your system. So click "Install Ubuntu" to go along with the installation process.
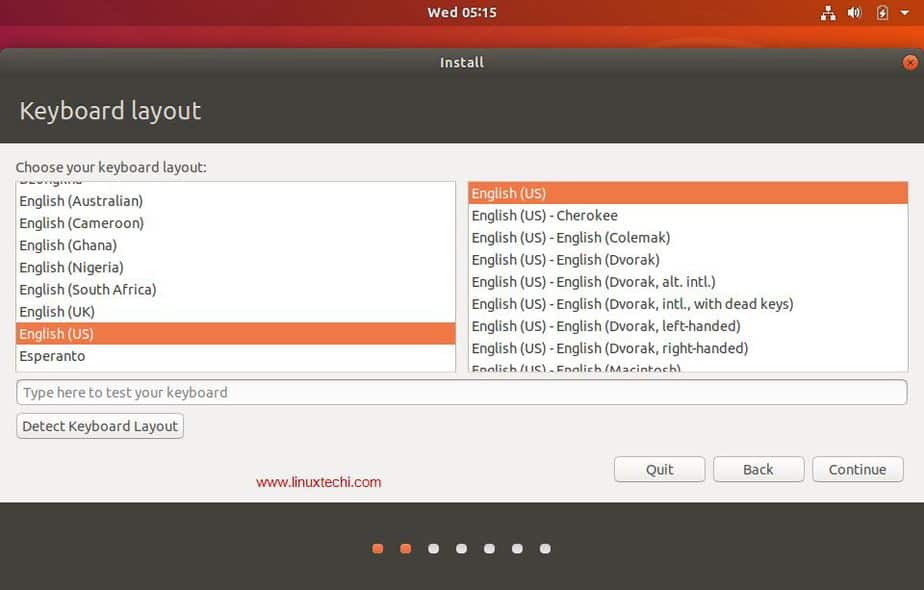
Step iv) Choose your Keyboard layout
Choose your favorite keyboard layout and click "Continue". By default English (US) keyboard is selected and if you want to modify, yous can change hither and click "Continue",
Step v) Preparing to Install Ubuntu and other Software
In the next screen, y'all'll be provided following beneath options including:
- Type of Installation: Normal Installation or Minimal installation, If you want a minimal installation then select second pick otherwise get for the Normal Installation. In my case I am doing Normal Installation
- Download Updates While Installing Ubuntu (select this option if your arrangement has net connectivity during installation)
- Install tertiary party software for graphics and Wi-Fi hardware, MP3 and additional media formats Select this option if your arrangement has internet connectivity)
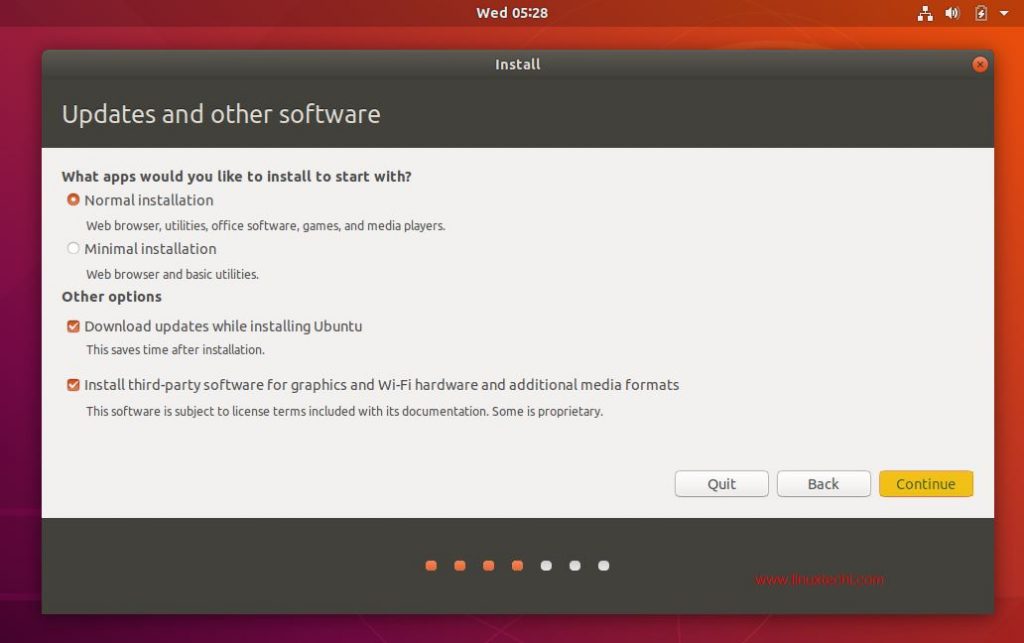
click on "Continue" to proceed with installation
Step vi) Select the advisable Installation Type
Next the installer presents you with the post-obit installation options including:
- Erase Disk and Install Ubuntu
- Encrypt the new Ubuntu installation for security
- Apply LVM with the new Ubuntu installation
- Something Else
Where,
Erase Disk and Install Ubuntu – Choose this option if your system is going to take merely Ubuntu and erasing anything other than that is not a problem. This ensures a fresh re-create of Ubuntu 18.04 LTS is installed in your system.
Encrypt the new Ubuntu installation for security – Choose this pick if you are looking for extended security for your disks equally your disks volition be completely encrypted. If you are beginner, then it is better non to worry near this selection.
Employ LVM with the new Ubuntu installation – Choose this option if you want to employ LVM based file systems.
Something Else – Choose this choice if y'all are advanced user and you want to manually create your own partitions and want to install Ubuntu along with existing Os (May be Windows or other Linux Flavor)
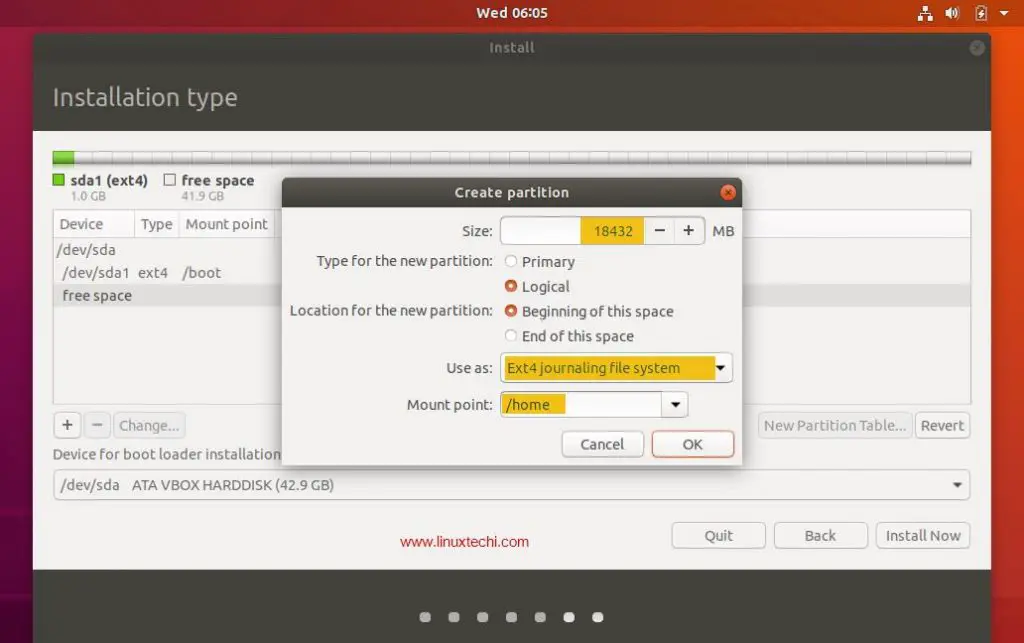
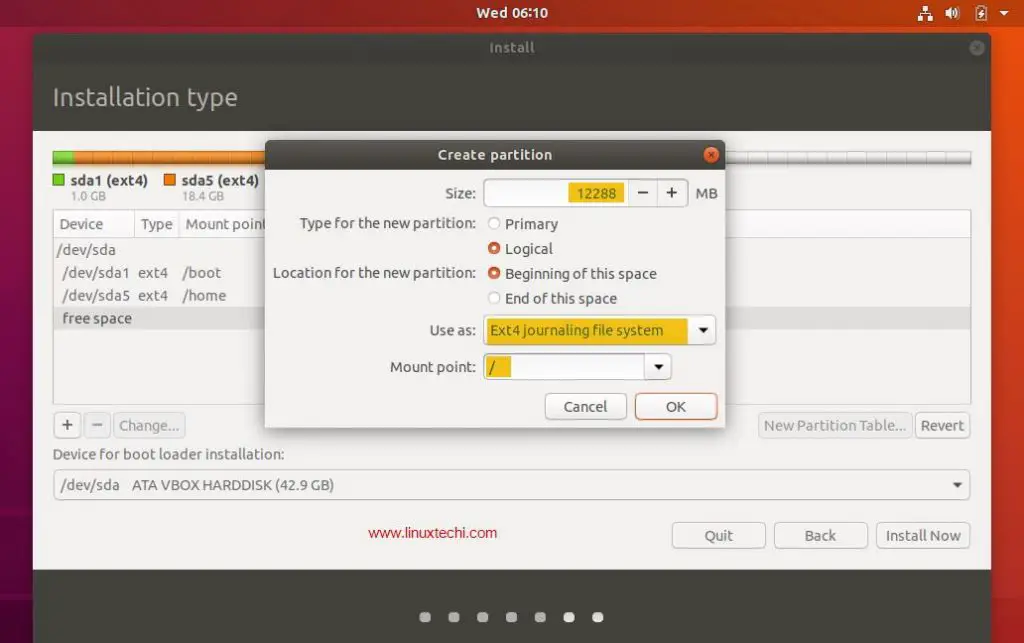
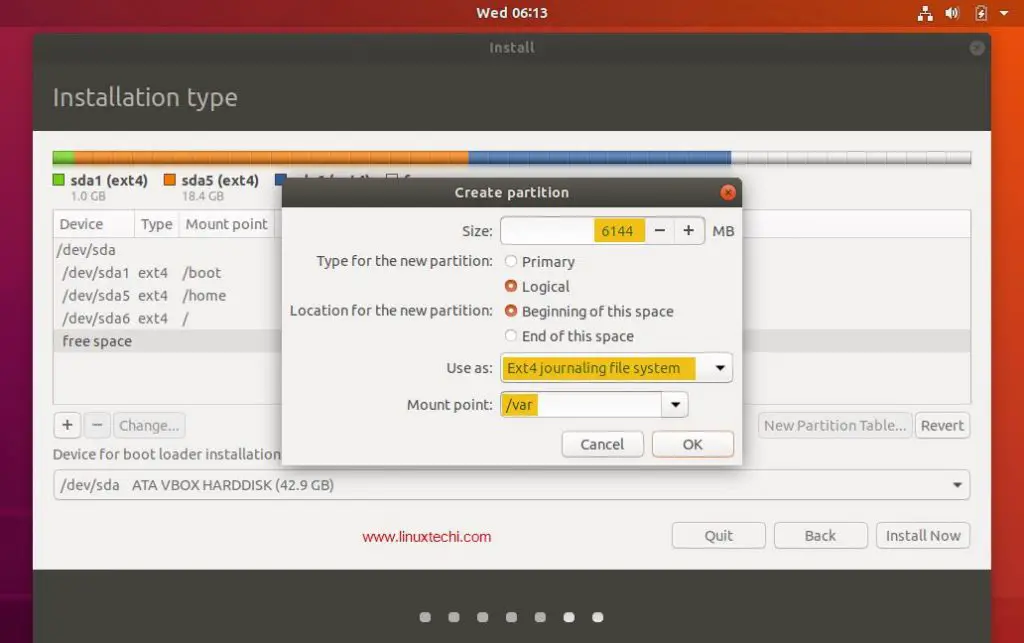
In this article, we will exist creating our custom partitions on a hd of xl GB and the following partitions are to be created:
- /kick 1 GB (ext4 files system)
- /home 18 GB (ext4 file system)
- / 12 GB (ext4 file system)
- /var half dozen GB (ext4 file system)
- Swap ii GB
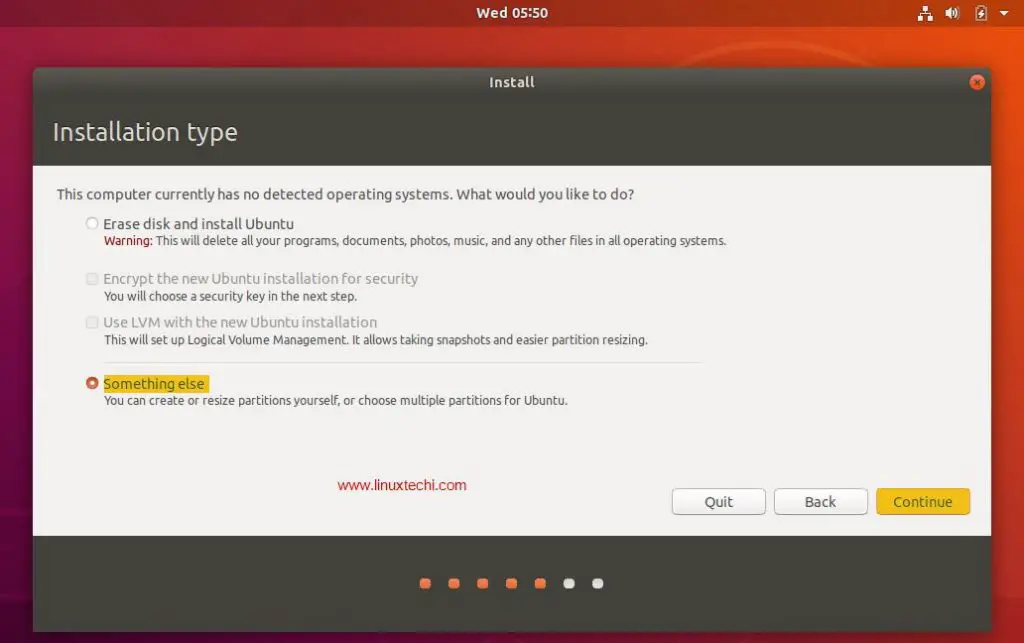
At present, Cull "Something Else" and Click on proceed
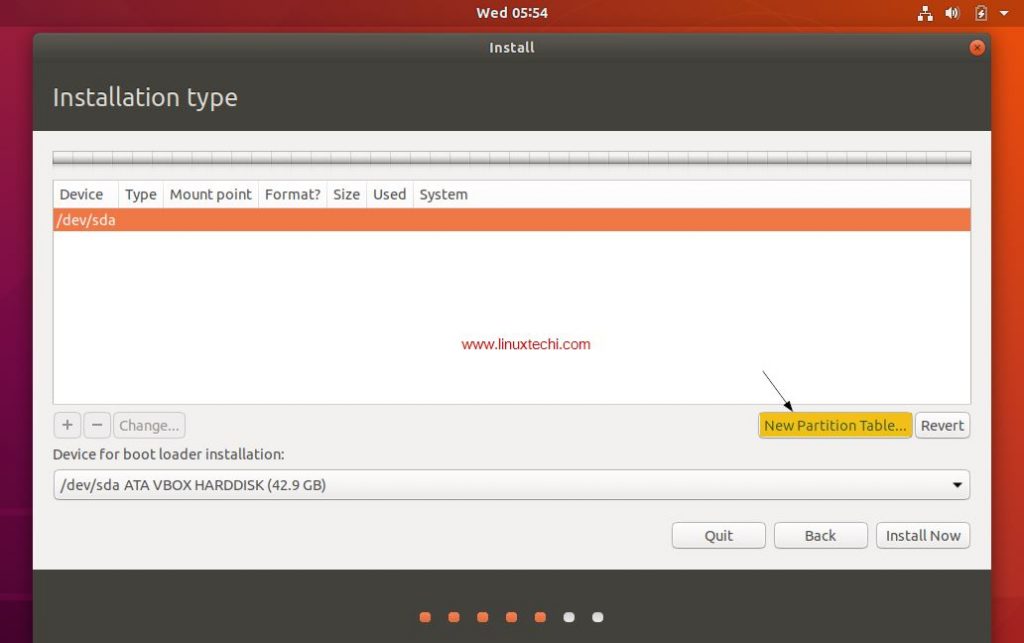
You tin see the available deejay size for Ubuntu in the adjacent window as shown beneath:
Now in order to create your own partitions, click on "New Partition Table"
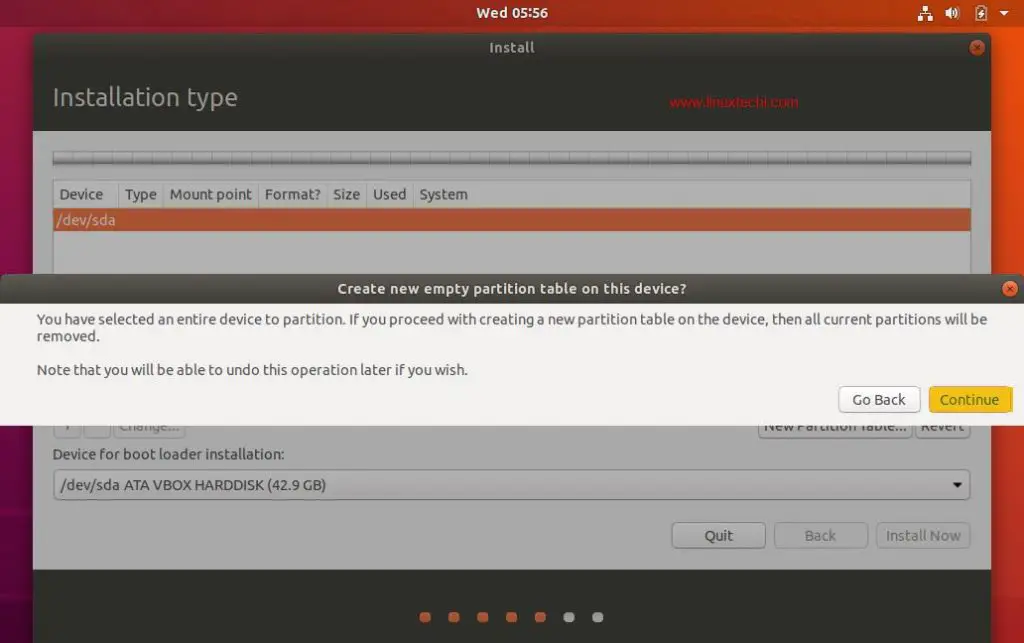
Click on Continue
Create /boot partition of size 1GB, Select the gratis space so Click on the "+" symbol to create a new sectionalization
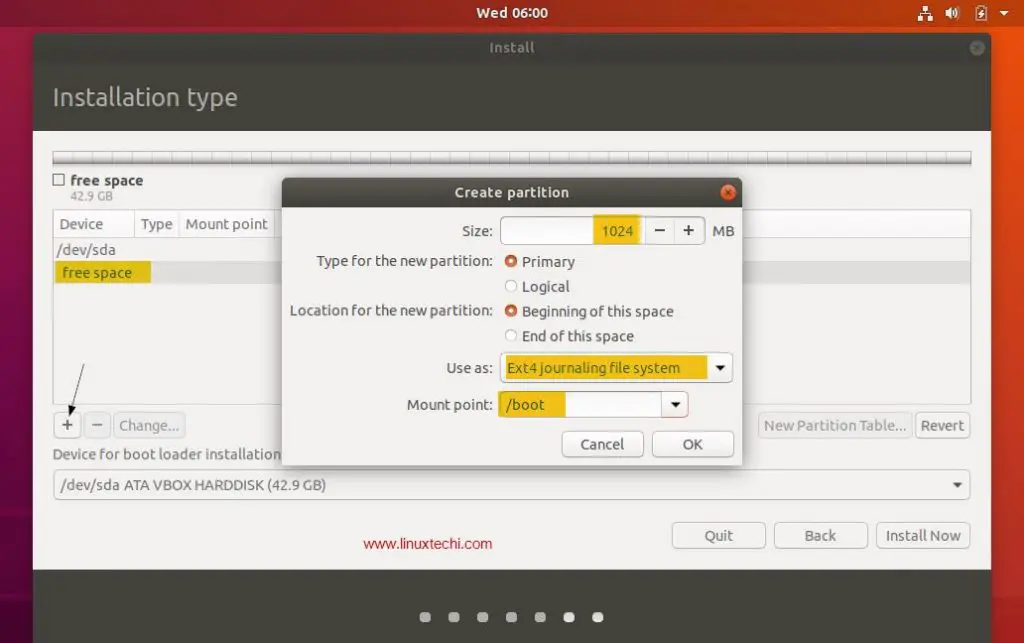
Click on "OK"
Let'due south create /home partition of size 18 GB,
In the same way create / & /var file organization of size 12 GB & half dozen GB respectively
Now create last partition as swap of size 2 GB,
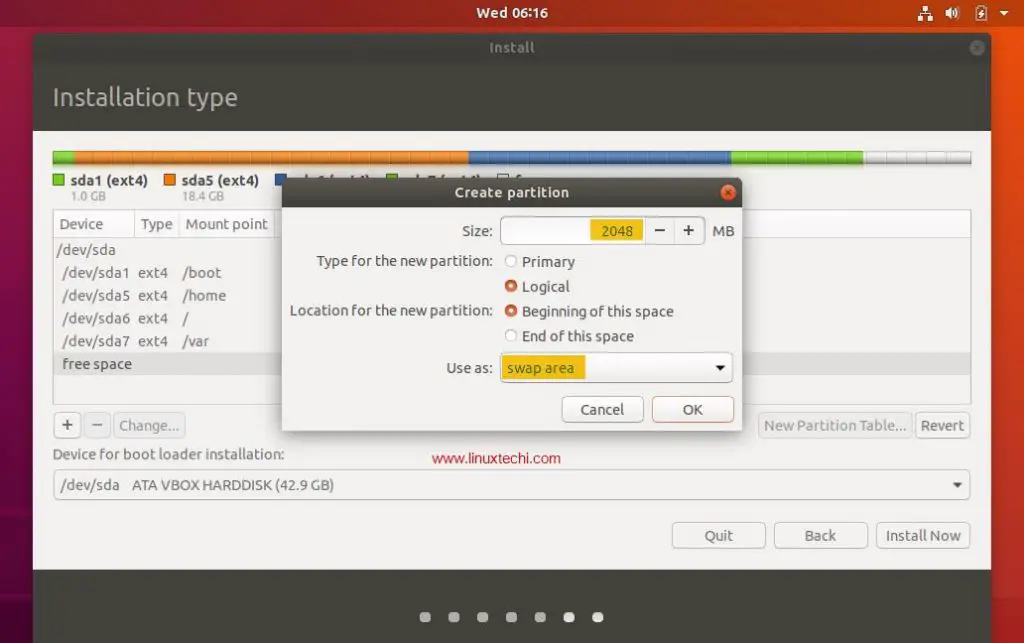
Click on OK
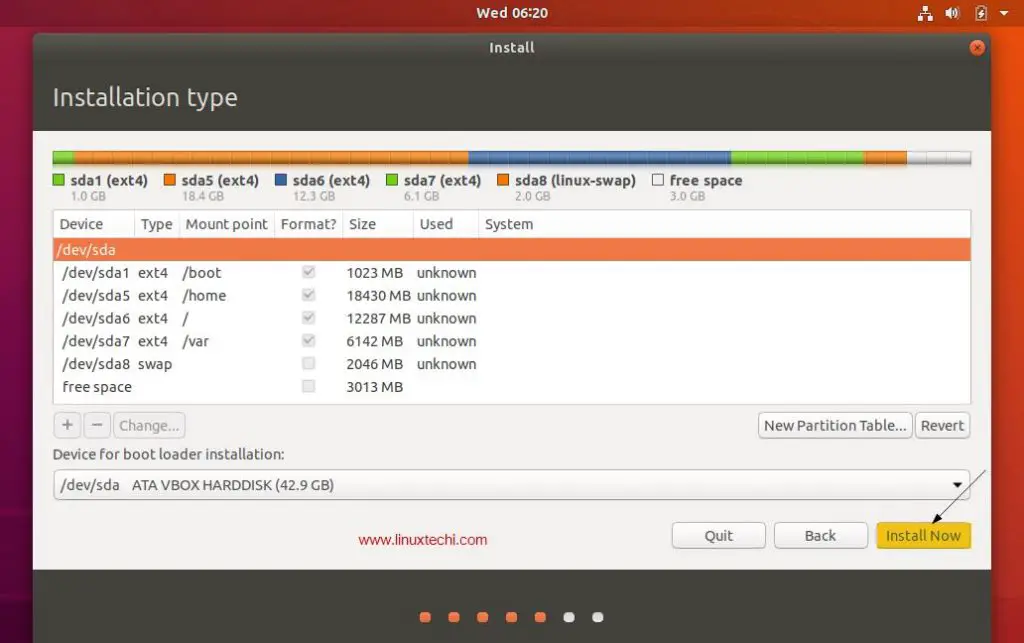
Once you are done with the partition creation task , so click on "Install At present" option to proceed with the installation
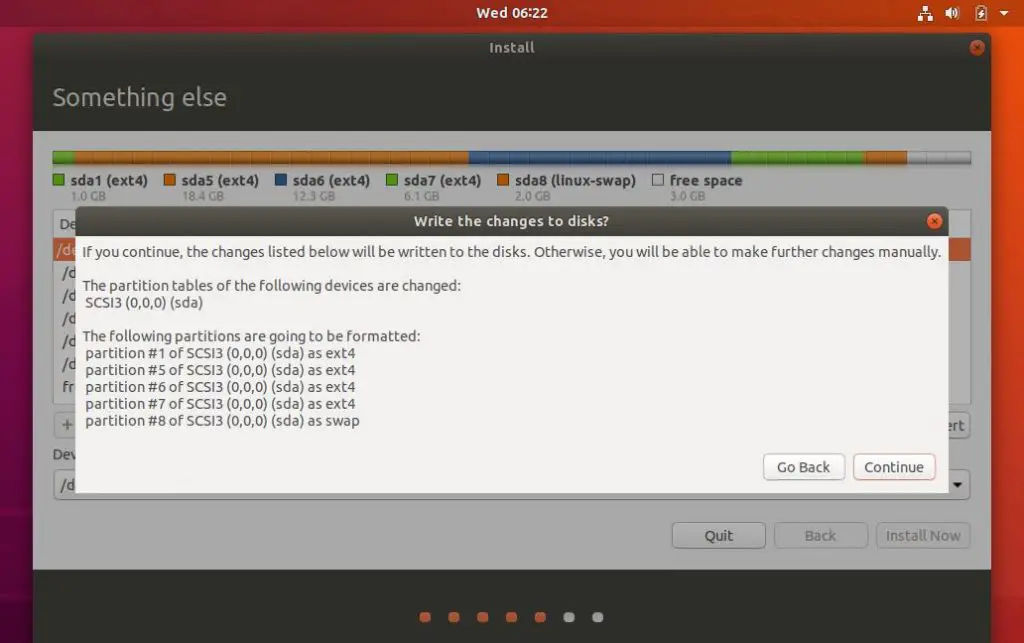
Now click on "Continue" to write all the changes to the disks
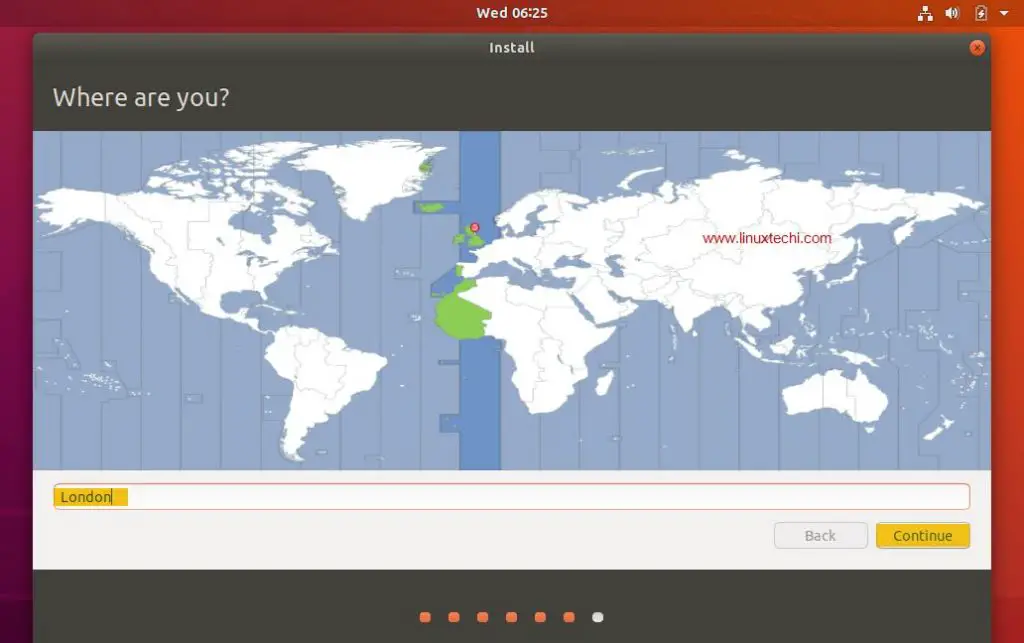
Step vii) Select Your Time zone
Choose your favorite time zone and then click on "Continue"
Step 8) Provide your User Credentials
In the next screen you will exist prompted to provide your user credentials. In this screen provide your name, computer name, username and the password to login into Ubuntu 18.04 LTS
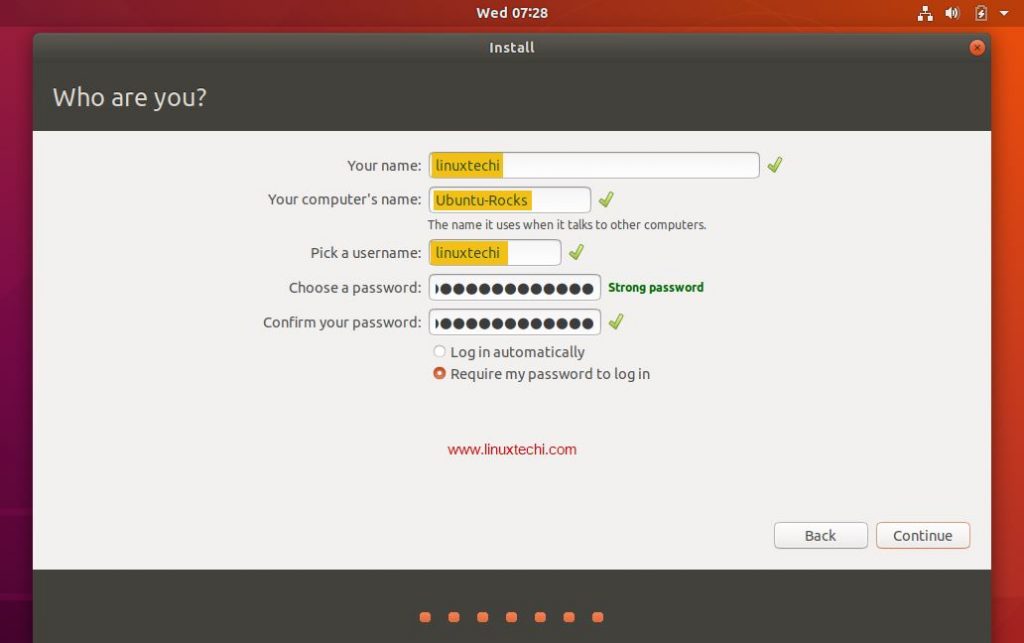
Click "Continue" to begin the installation process.
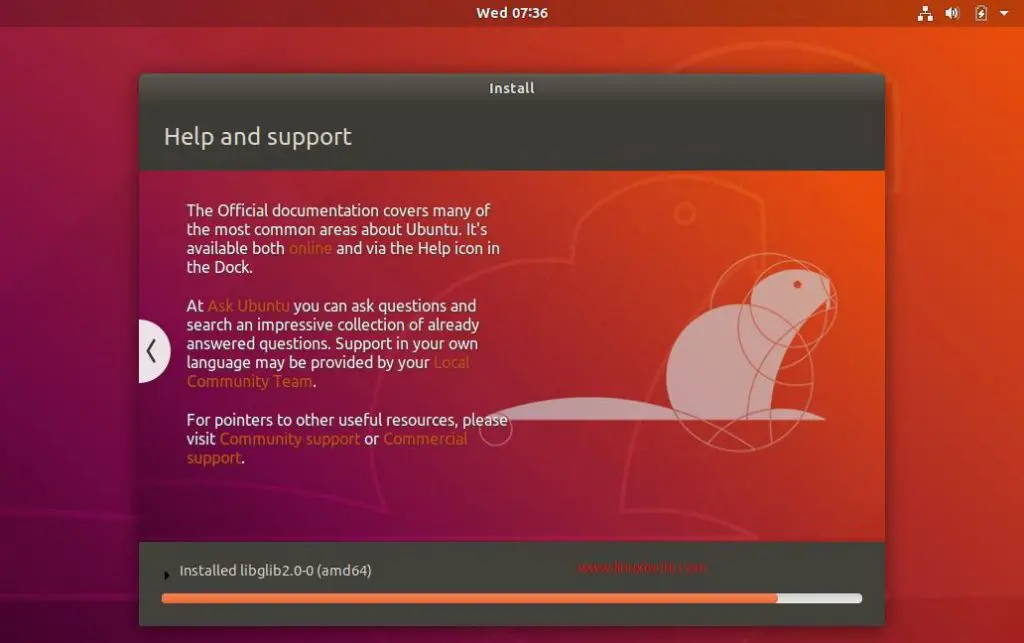
Pace 9) Start Installing Ubuntu eighteen.04 LTS
The installation of Ubuntu 18.04 LTS starts now and will take around 5-10 mins depending on the speed of your computer,
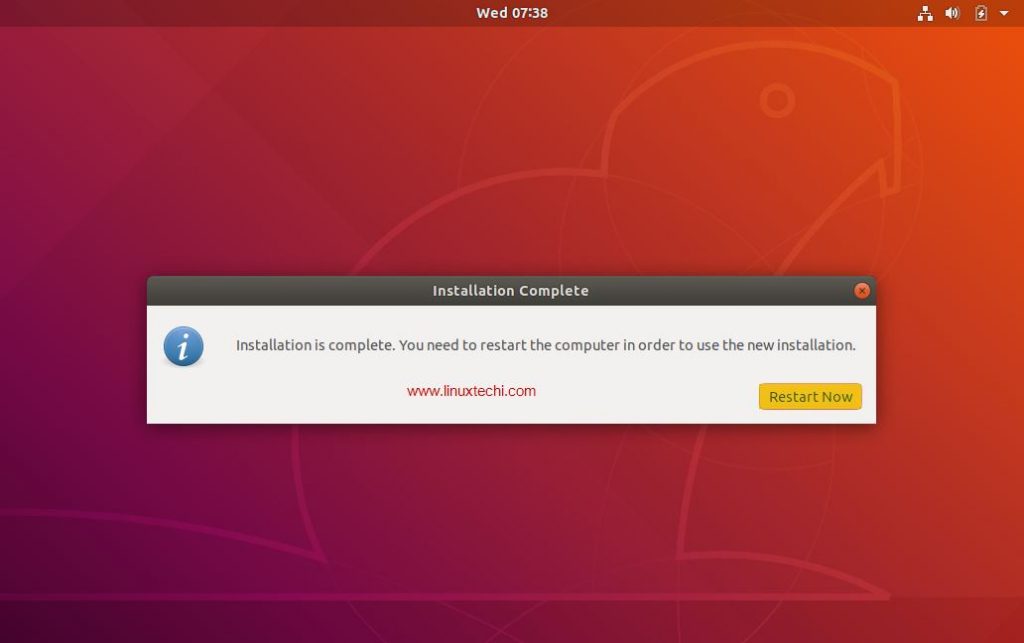
Step 10) Restart Your System
In one case the installation is completed, remove the USB/DVD from the drive and Click "Restart Now" to restart your organisation.
Read More on : How to Install VirtualBox 6.0 on Ubuntu 18.04 LTS / 18.10 / CentOS vii
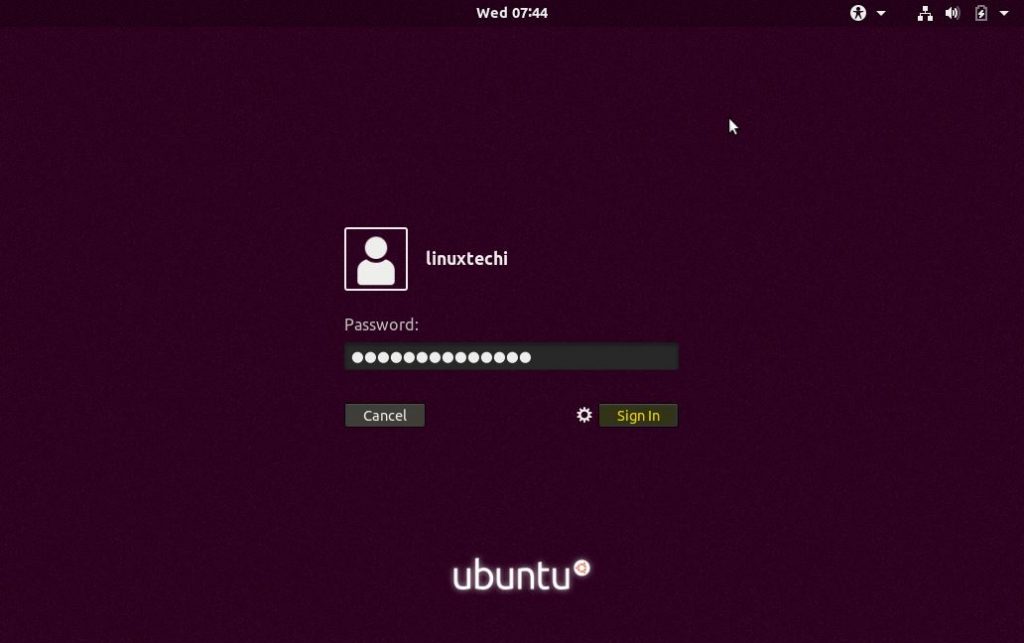
Step:11) Login to Your Ubuntu 18.04 desktop
Once your system has been rebooted after the installation so you volition get the below login screen, enter the User name and password that you accept gear up during installation (Step 8)
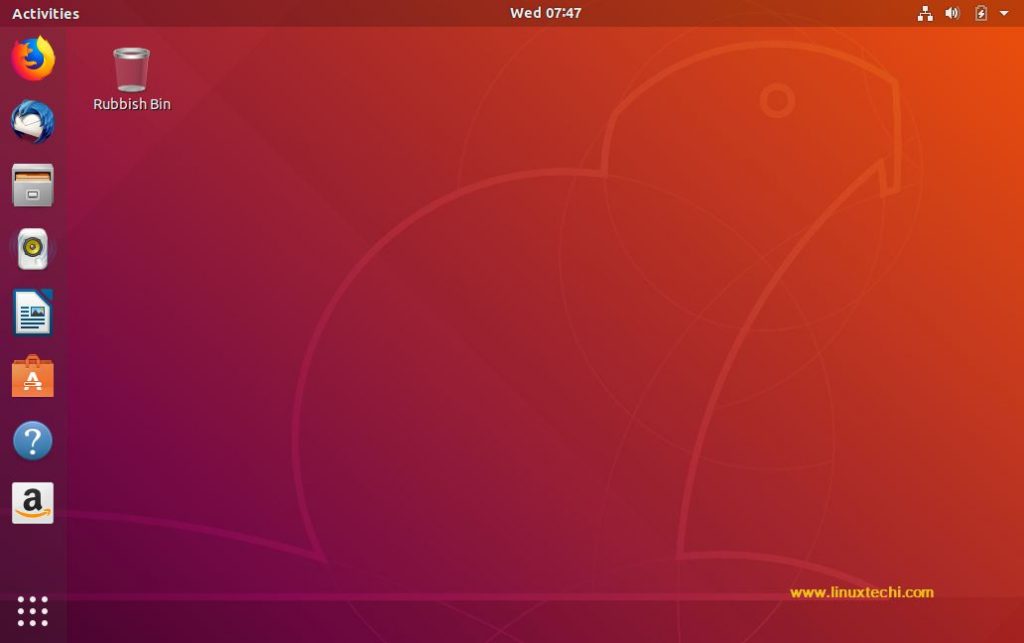
And that concludes our step by step installation guide for Ubuntu eighteen.04 LTS and it'southward all up to you now to explore the exciting features of Ubuntu 18.04 LTS and have fun 🙂
Read Too : Acme 10 Things to do Afterwards Installing Ubuntu 18.04 LTS Desktop
Read Also : How to Upgrade Ubuntu 18.04 LTS to Ubuntu xx.04 LTS
DOWNLOAD HERE
Posted by: webstermuct1985.blogspot.com